Effortlessly Chic: Your Guide To How To Make A Messy Hair Bun
A messy hair bun, you know, it's almost like that perfect accessory that just seems to work for nearly any occasion. Whether you're rushing out the door for work, heading to a casual brunch with friends, or even dressing up for a special evening, this hairstyle has a wonderful way of fitting right in. It’s a look that whispers "effortless style" while still making a pretty strong statement about your easygoing charm. Many people, it seems, are really keen on finding out how to get this look just right, and honestly, it’s not as tricky as you might think.
This particular hairstyle, you see, offers a wonderful blend of comfort and chic appeal. It’s less about strict rules and more about embracing a bit of natural flow, which is quite refreshing in the world of hair styling. You don't need to be a hair expert, or have a salon full of fancy tools, to pull off a great messy bun. It's truly a style that anyone can try, and that's part of its enduring popularity, in a way.
So, if you've ever found yourself wishing for a go-to hairstyle that’s both quick and stylish, then learning how to make a messy hair bun is absolutely for you. We'll walk through everything, from gathering your supplies to those little touches that make all the difference, giving you the confidence to rock this look. It’s about finding that simple, practical solution for your hair, much like finding a tool that just makes things easier, you know?
- Who Is Camilla Araujo
- Bebe Rexha Hawtcelebs
- What Illness Did Cindy Williams Have
- Kahoott
- Matt Damon Bourne Movie
Table of Contents
- Why Love the Messy Bun?
- Getting Ready: Your Messy Bun Toolkit
- Prepping Your Hair for the Perfect Mess
- The Classic Messy Bun: Step-by-Step
- Messy Bun Variations to Try
- Tips for Different Hair Types
- Troubleshooting Your Messy Bun
- When to Rock Your Messy Bun
- Frequently Asked Questions
Why Love the Messy Bun?
There are quite a few good reasons why the messy bun has stayed a favorite for so many people, honestly. It’s a look that just feels so natural and unforced, which is a big part of its charm. You don't have to worry about every strand being perfectly in place, and that freedom is pretty liberating, isn't it?
For one thing, it's incredibly versatile. You can wear it to the gym, to a job interview, or even to a fancy dinner, and it just works. It’s that kind of adaptable style that really comes in handy when you're short on time but still want to look put together, you know? It’s a quick fix that often looks like you spent much more time on it than you actually did.
Plus, it’s comfortable. No tight ponytails pulling at your scalp all day. The messy bun allows for a bit of give, making it a truly pleasant hairstyle to wear for hours on end. It’s a practical choice that doesn't sacrifice style, and that's definitely a win-win situation, so it seems.
- Wallpaper Funny Iphone
- How To Style Thick Hair
- Conclude Transition Words
- Black Guy In Commercials
- Twitter Riding Dildo
Getting Ready: Your Messy Bun Toolkit
Before you even begin twisting and looping, having the right things on hand can make a big difference, honestly. Think of it like gathering your simple tools before starting a project; it just makes everything flow smoother. You don't need a lot of complicated items, just a few key bits and pieces, you know?
Hair Tie(s): Choose one that's gentle on your hair but has enough grip. Fabric ties, like scrunchies, can be really good for this, as they don't leave harsh creases and they offer a softer hold. You might need one or two, depending on your hair's thickness, so keep a spare handy.
Bobby Pins: These are your secret helpers for taming any stray bits or securing the bun if it feels a little loose. Having a handful nearby is always a good idea, as you might need just a few to get that perfect, slightly undone look, or to keep things from falling out later, you know?
Hair Spray (Optional but Recommended): A light-hold hair spray can help keep your messy bun in place without making it stiff. It's about setting the style without making it feel like a helmet, which is pretty important for that natural vibe. A little mist can go a long way.
Dry Shampoo or Texturizing Spray (Optional): If your hair is too clean or a bit flat, these products can add some much-needed grip and volume. They give your hair that "lived-in" feel that’s just right for a messy bun, so it's almost like giving your hair a little boost before you start.
Hair Brush or Comb: You might want to brush your hair before you start, just to get rid of any tangles. However, for the messy look, you'll want to avoid over-brushing, as that can make it too sleek. A quick run-through is usually enough, you know?
Prepping Your Hair for the Perfect Mess
The condition of your hair before you start can really influence how well your messy bun turns out, honestly. Sometimes, hair that's a day or two old actually works best because it has a bit more texture and grip than freshly washed hair. This extra grip helps the bun hold its shape better, so it's almost like your hair is cooperating more readily, you know?
If your hair is super clean and feels a bit slippery, a little dry shampoo or texturizing spray can be your friend. Just spray a bit at the roots and through the lengths, then gently massage it in. This adds that much-needed grit, making your hair less likely to slip out of the bun. It's a simple trick that really makes a difference, honestly.
You also want to consider if your hair is dry. Trying to create a messy bun with wet or even damp hair can be a bit frustrating, as it often doesn't hold its shape as well and can end up looking a little limp. Make sure your hair is completely dry for the best results, so you're not fighting against any extra moisture, you know?
The Classic Messy Bun: Step-by-Step
Alright, let’s get down to the actual making of your messy bun. This is where the magic happens, and it’s surprisingly simple, you know? Remember, the goal isn't perfection, but rather that perfectly imperfect look. It’s about letting your hair do its thing a little, rather than trying to force it into a precise shape.
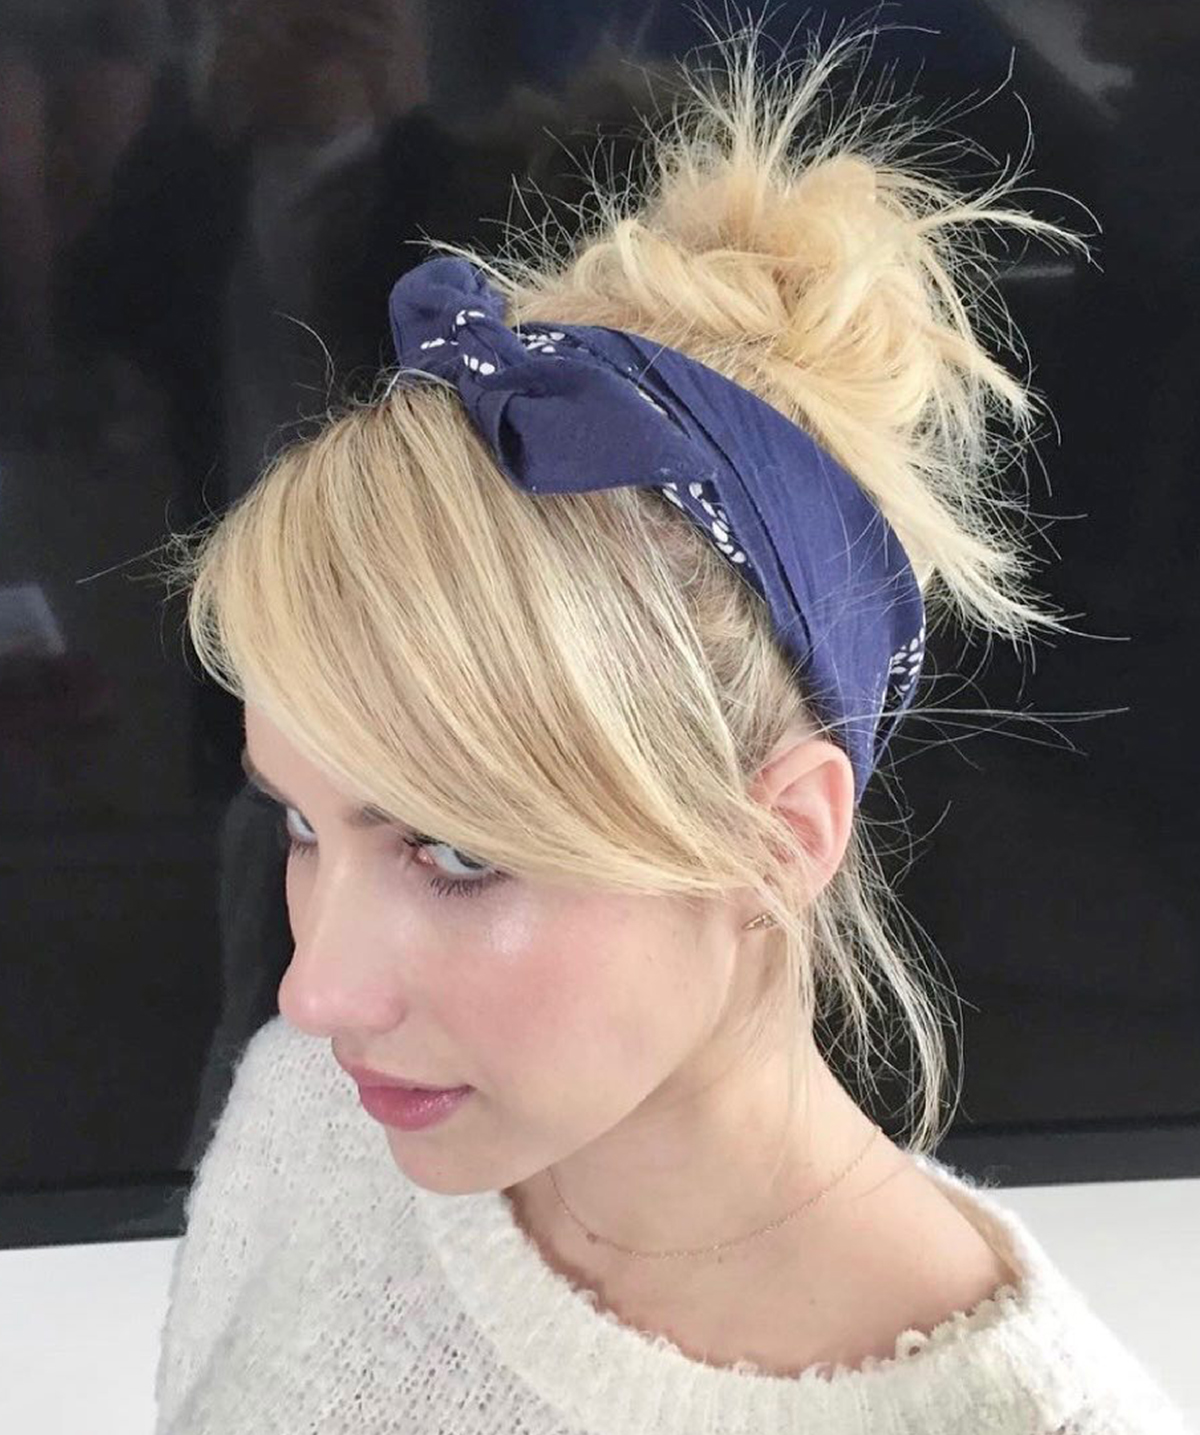
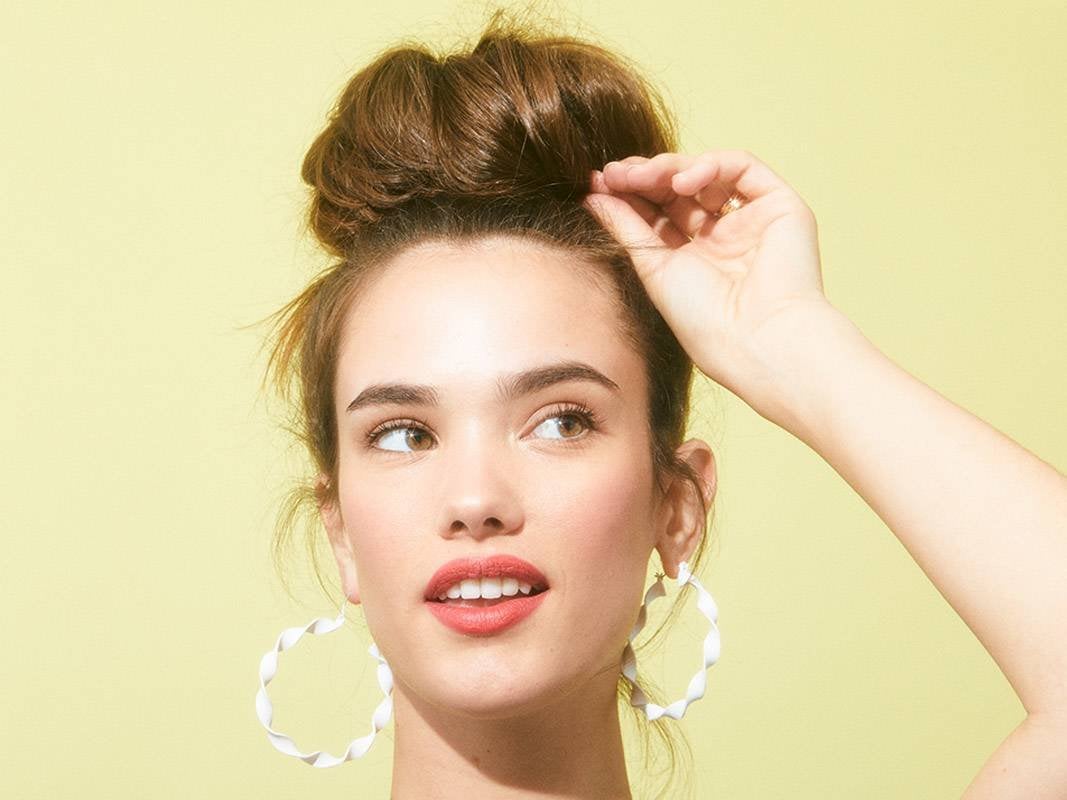
The High Messy Bun
This version sits on top of your head, giving you a playful, energetic vibe. It’s pretty popular for a reason, honestly, as it helps to lift your face and can feel really light.
Gather Your Hair: First, tip your head forward a bit and gather all your hair into a high ponytail, right on the crown of your head. You want it where you'd typically place a high pony. Don't worry about it being super neat; a few loose strands around your face are actually part of the charm, you know?
Secure with a Tie: Wrap a hair tie around your ponytail once, maybe twice, to secure it. On the last wrap, only pull your hair halfway through, creating a loop. The ends of your hair will be sticking out at the bottom. This initial loop is key for the messy shape, so it’s almost like setting the foundation.
Create the Bun: Now, take the ends of your hair that are sticking out and wrap them loosely around the base of that loop you just made. You don't need to be precise here; the looser and more organic, the better. This is where the "messy" part really starts to take shape, you know?
Secure the Ends: Once you've wrapped the ends, tuck them under the hair tie or use a bobby pin or two to secure them. You might need to adjust the placement a bit to make sure it feels stable. It’s about making sure it stays put without looking too rigid, honestly.
Fluff and Loosen: This is the fun part! Gently pull on small sections of the bun to loosen it up and create that soft, full look. You can also pull a few wispy pieces out around your face and neck to frame your features. It’s about creating that effortlessly chic appearance, so feel free to play around a little, you know?
Set with Spray: A quick spritz of light-hold hair spray can help keep everything in place, especially those lovely loose pieces. This helps the bun last throughout your day without feeling stiff, which is pretty important for comfort, honestly.
The Low Messy Bun
This style sits at the nape of your neck, offering a more refined yet still relaxed look. It's perfect for when you want something a bit more understated, you know?
Gather Hair at the Nape: Collect all your hair at the base of your neck, as if you were going to make a low ponytail. Again, don't worry about perfection; a bit of looseness around the ears and neck adds to the charm. This position gives it a softer, more elegant feel, so it's almost like a different mood entirely.
Form a Loose Ponytail: Secure it with a hair tie, but keep it quite loose. You might wrap the tie once or twice, depending on your hair's thickness. The key here is not to pull it too tight, as that would take away from the messy vibe, honestly.
Twist and Loop: Take the ponytail and gently twist it into a loose rope. Then, coil this twisted rope around the base of your ponytail, forming a bun shape. You can experiment with coiling it tightly or more loosely, depending on the look you're after, you know?
Secure the Bun: Use bobby pins to secure the coiled bun in place. You'll likely need several pins, pushing them into the bun and anchoring them against the hair on your head. Make sure it feels secure but not overly stiff, so it can still have that natural movement.
Gently Loosen: Just like with the high bun, gently pull on sections of the bun to create more volume and a softer, messier appearance. You can also pull out a few strands around your face for a more relaxed frame. This step really brings the "messy" to life, honestly.
Finish with Spray: A light mist of hair spray will help hold your low messy bun without making it feel rigid. This ensures your style lasts through your day, keeping those perfectly placed loose bits just where you want them, you know?
Messy Bun Variations to Try
Once you've got the classic messy bun down, you might want to try some fun variations, honestly. These can add a fresh twist to your everyday look, or give you even more options for different occasions. It’s about playing around a bit with your hair, you know?
The Half-Up Messy Bun
This style is perfect for showing off your hair length while still keeping some hair off your face. It's a bit more casual, but still really stylish, so it's almost like getting two looks in one.
Section Your Hair: Take the top section of your hair, from your temples up to the crown of your head. You're basically gathering the hair that would typically be in a half-ponytail. Make sure this section isn't too thick, or it might make the bun look heavy, you know?
Create a Small Ponytail: Secure this top section with a small hair tie. You can place it high on your head for a more playful look, or slightly lower for something a bit softer. This forms the base for your mini messy bun, honestly.
Form the Mini Bun: On the last loop of your hair tie, only pull your hair halfway through to create a small loop. Then, wrap the remaining ends around the base of this loop and secure with a bobby pin. It’s just like making a regular messy bun, but on a smaller scale, you know?
Fluff and Finish: Gently pull on the bun to make it appear fuller and messier. Let some strands fall around your face naturally. This style is pretty relaxed, so don't overthink it, honestly.
The Double Messy Bun
Also known as "space buns," this playful style involves two messy buns, usually placed high on either side of your head. It’s a very fun and youthful look, so it's almost like adding a bit of whimsy to your day.
Part Your Hair: Create a neat part down the middle of your head, from your forehead to the nape of your neck. This divides your hair into two equal sections. A clean part helps keep the buns symmetrical, you know?
Create Two High Ponytails: Gather each section of hair into a high ponytail on either side of your head. Try to make them even in height and position. Secure each with a hair tie. These will be the bases for your two buns, honestly.
Form Each Bun: For each ponytail, follow the steps for the classic high messy bun: loop the hair halfway through the tie on the last wrap, then loosely wrap the ends around the base and secure with bobby pins. Remember to keep them messy, so don't try to make them too perfect.
Adjust and Loosen: Gently pull on each bun to loosen it and make it fuller. You can also pull out some face-framing pieces if you like. This is where you really get that playful, carefree vibe, you know?
Set with Spray: A light mist of hair spray on both buns will help them stay put throughout the day. This is pretty important for keeping those fun shapes intact, honestly.
Tips for Different Hair Types
While the messy bun is pretty universal, some hair types might need a little extra attention to get the look just right, honestly. It's about working with your hair's natural qualities, not against them, you know? Just like finding the right setting for a tool, it's about understanding what your hair needs.
Fine Hair Helpers
Fine hair can sometimes struggle to hold volume, making a messy bun seem a bit flat. But don't worry, there are ways to give it that extra oomph, so it's almost like giving your hair a little lift.
Texturizing Spray is Key: Before you even start, generously spray a texturizing product or dry shampoo throughout your hair. This adds grip and body, making it easier to create volume. It’s truly a game-changer for fine strands, honestly.
Tease Gently: Lightly tease the roots of your ponytail before forming the bun. This creates a fuller base for your bun to sit on. Just a little teasing can make a big difference in how full your bun appears, you know?
Use More Pins: Fine hair can be slippery, so don't be shy with bobby pins. Use them to secure sections of the bun, making sure it feels stable. It’s about creating a solid foundation that will last, honestly.
Consider a Hair Donut: For extra volume, you can use a hair donut (a foam ring) as a base. Pull your ponytail through the donut, then spread your hair over it and secure. This gives the illusion of a much fuller bun, so it's almost like a little secret helper.
Thick Hair Tricks
Thick hair has plenty of volume, but it can sometimes be heavy or hard to manage into a bun. The trick is to embrace its natural fullness while ensuring it stays secure, you know?
Looser is Better: Don't try to force all your hair into a super tight bun. Embrace the volume by keeping your wraps looser. This allows your bun to look naturally full, rather than like a tight knot, honestly.
Strong Hair Ties: You'll need a hair tie that can handle the weight of your hair without snapping. Look for strong, durable ones, perhaps even two if one isn't enough. It’s about having the right support for your hair, so it's almost like using a sturdy anchor.
Sectioning Can Help: If your hair is extremely thick, you might find it easier to split your ponytail into two or three sections, then loosely twist and wrap each section around the base before pinning. This helps distribute the weight and makes it more manageable, you know?
Plenty of Bobby Pins: Use a good number of bobby pins to secure your bun from all angles. Make sure they're anchored into the hair on your head, not just the bun itself, for maximum hold. It's about making sure it stays put, honestly.
Curly Hair Charm
Curly hair already has amazing texture, which is perfect for a messy bun. The goal is to enhance those natural curls while keeping the bun from becoming a frizzy mess, you know?
Work with Natural Curls: Don't try to straighten your curls before making the bun. Embrace their natural bounce and texture. This will give your messy bun a wonderful, unique shape, honestly.
Leave Some Curls Out: Pull out a few curly tendrils around your face and neck. These will beautifully frame your face and add to the effortless, romantic feel of the bun. It’s about letting your curls shine a little, so it's almost like giving them a moment in the spotlight.
Moisture is Key: Ensure your curls are well-moisturized before styling to minimize frizz. A leave-in conditioner or curl cream can help. Happy, hydrated curls are easier to work with and look better in a bun, you know?
- Knock Knock Jokes Dirty
- Aaron Boones Daughter
- 菲奧娜勞登
- Did Hunter Fieri Get Married
- Spencer Breslin Movies
25 Messy-Bun Hairstyle Ideas to Copy ASAP | Who What Wear
Messy Big Hair Bun - Spacotin

How to Make a Messy Bun With Extremely Long Hair: 13 Steps
