How To Pair Beats Studio Headphones: Your Complete Connection Guide
Getting your favorite tunes or podcasts flowing through your Beats Studio headphones is a really satisfying feeling, isn't it? Yet, for some, that first step of getting them to talk to your devices can feel a bit like a puzzle. It’s a common thing, you know, when you first get a new piece of tech, and you just want it to work right away.
This guide, you see, is all about making that process super simple. We’re going to walk through each bit of connecting your Beats Studio headphones, whether you have the Studio Pro or the Studio Wireless models. It’s really quite straightforward once you know the steps, and we’ll cover everything from the very first setup to what to do if things aren't quite clicking.
We’ll look at how to get your sound gear talking to your computer, your phone, or even your tablet. It’s about making sure you can enjoy your audio without any fuss, and, you know, just get to the good part: listening. So, let’s get those headphones ready for some serious sound.
- Is Mike Sherm From The Bay
- Mayme Johnson
- Tony Reali Salary
- Safe Baby Sleeping Bag
- Kelly Reilly Upper Lip
Table of Contents
- Understanding the Idea of Pairing
- Getting Your Beats Studio Ready to Connect
- Connecting Beats Studio Wireless to Your Phone or Tablet
- Hooking Up Beats Studio Pro to Your PC
- Mastering Your Beats Studio Controls
- What if Things Don't Connect? Troubleshooting Common Pairing Issues
- Keeping Your Connection Strong
- Frequently Asked Questions (FAQs)
Understanding the Idea of Pairing
When we talk about "pairing" your Beats Studio headphones, we’re essentially talking about creating a special, secure wireless link between your headphones and another device, like your phone or computer. It’s a bit like introducing two new friends so they can communicate directly. This link, you know, lets them send audio signals back and forth without needing any wires.
This idea of pairing, actually, is very common in our everyday gadgets. Think about it: two things, often of the same appearance and size, that are intended to be used together. A pair of shoes, for example, or a pair of earrings. In the world of technology, it means two devices that are matched for use together, like your headphones and your smartphone. So, it's about making sure they recognize each other.
It’s a process that happens over Bluetooth, which is a short-range wireless technology. Once your Beats Studio headphones are paired, they usually remember that connection, making it much easier to connect them again in the future. You might just need to turn them on, and they’ll find your device, which is pretty handy.
- How Old Are Brigitte Macron Children
- Snapgod
- Joey Tempest Net Worth
- What Happened To Zach Bryans Dad
- Saquon Age
Getting Your Beats Studio Ready to Connect
Before you even start trying to connect your headphones, there are a couple of small but important things to do. These steps, you know, help make sure the pairing process goes smoothly the very first time. It's almost like setting the stage for a good performance, really.
Powering Up Your Headphones
First things first, you’ll want to make sure your Beats Studio headphones have enough charge. They won't be able to connect if their battery is too low, or if they are completely out of power. So, you know, give them a good charge before you begin. A little bit of charge can go a long way, actually, when you are trying to get them to light up and be ready.
You can usually tell if they’re charging by a light indicator on the headphones themselves. It’s pretty common for it to be a solid light when charging and then turn off or change color when fully charged. This simple step, you see, saves a lot of frustration later on if your headphones aren't showing up on your device.
Finding the Pairing Button
Every set of Beats Studio headphones, whether it’s the Studio Pro or the Studio Wireless, has a specific button or a combination of buttons you need to press to put them into "pairing mode." This mode, basically, makes them discoverable by other devices. It's like them announcing, "Hey, I'm here and ready to connect!"
For most Beats Studio models, you'll typically find a small button, often on the right ear cup or near the power button. You'll need to press and hold this button for a few seconds until a light starts blinking, which, you know, signals that they’re ready to be found. This blinking light is your cue to look for them on your device’s Bluetooth settings.
Connecting Beats Studio Wireless to Your Phone or Tablet
Connecting your Beats Studio Wireless headphones to a smartphone or tablet is a really common thing to do, and it’s usually quite simple. Whether you have an iPhone, an iPad, or an Android device, the steps are pretty similar, though there are slight differences in where you tap on the screen. So, let’s go through it.
For Apple iOS Devices (iPhones and iPads)
If you have an Apple device, the process is often very smooth, thanks to the way Apple products tend to work together. First, make sure your Beats Studio Wireless headphones are charged and in pairing mode, with that little light blinking. Then, grab your iPhone or iPad.
- Go to your device's "Settings" app. You know, the one with the gear icon.
- Tap on "Bluetooth." This will take you to the Bluetooth settings screen, where you can see all the devices your phone has connected to before, and any new ones nearby.
- Make sure the "Bluetooth" toggle at the top of the screen is turned on. It should be green if it’s active.
- Your iPhone or iPad will start looking for nearby Bluetooth devices. You should see your Beats Studio Wireless headphones appear under a section like "Other Devices" or "My Devices." It might show up as "Beats Studio Wireless" or something similar.
- Tap on the name of your headphones when you see it. Your device will then try to establish a connection.
- Once connected, the name of your Beats Studio Wireless headphones will move up to the "My Devices" section, and it will say "Connected" next to it. The light on your headphones will usually stop blinking and stay solid, which is a good sign.
And that’s it, really! You should now be able to play audio through your headphones. It's pretty straightforward, actually, for most people.
For Android Phones and Tablets
Connecting your Beats Studio Wireless headphones to an Android device is also a pretty easy task. The menu names might vary a tiny bit depending on which Android phone you have, like a Samsung, Google Pixel, or another brand, but the core steps remain the same. So, let's get into it.
- First, ensure your Beats Studio Wireless headphones are charged and in pairing mode. Remember that blinking light? That's what you're looking for.
- Open your Android device's "Settings" app. You can often find this by swiping down from the top of your screen and tapping the gear icon, or by finding the "Settings" app in your app drawer.
- Look for a section called "Connected devices" or "Bluetooth & device connection." This is where your phone manages all its wireless connections.
- Tap on "Bluetooth." Make sure Bluetooth is turned on. There's usually a toggle switch for this, and it should be blue or green when active.
- Your phone will start scanning for available devices. You might see a button that says "Pair new device" or "Add new device." Tap that if you don't see your headphones right away.
- When "Beats Studio Wireless" (or a similar name) appears in the list of available devices, tap on it. Your phone will then try to connect.
- Once the connection is made, your headphones will show as "Connected" in your Bluetooth device list. The light on your headphones will stop blinking and stay solid.
You’re all set to enjoy your audio. This process, you know, is quite similar across many different Android phones, so you should be good to go.
Hooking Up Beats Studio Pro to Your PC
Connecting your Beats Studio Pro headphones to a computer, whether it's a Windows PC or a Mac, is also a very common need, especially for work, online meetings, or just enjoying music at your desk. The process is a little different than with a phone, but it’s still very manageable. So, let’s go through the specifics for each type of computer.
On a Windows Computer
If you're using a Windows computer, the steps involve going into your system settings to add a new Bluetooth device. This is pretty standard for any wireless accessory you want to use with your computer. So, here’s how you do it:
- First, make sure your Beats Studio Pro headphones are charged and put them into pairing mode. That blinking light is your signal, remember?
- On your Windows computer, click the "Start" button (the Windows logo in the bottom-left corner of your screen).
- Click on the "Settings" icon, which looks like a gear.
- In the Settings window, click on "Devices." This is where you manage all your connected gadgets, including Bluetooth ones.
- On the left-hand side, click on "Bluetooth & other devices."
- Make sure the "Bluetooth" toggle switch is turned "On." It should be blue.
- Click on "Add Bluetooth or other device." A new window will pop up.
- In the "Add a device" window, select "Bluetooth." Your computer will then start searching for nearby Bluetooth devices.
- When "Beats Studio Pro" appears in the list, click on it. Your computer will then try to connect to your headphones.
- You might see a notification saying "Your device is ready to go!" or similar, confirming the connection. The light on your Beats Studio Pro headphones will stop blinking and become solid.
Now your Beats Studio Pro headphones should be connected to your PC, and you can select them as your audio output device. This is really quite handy for video calls, by the way.
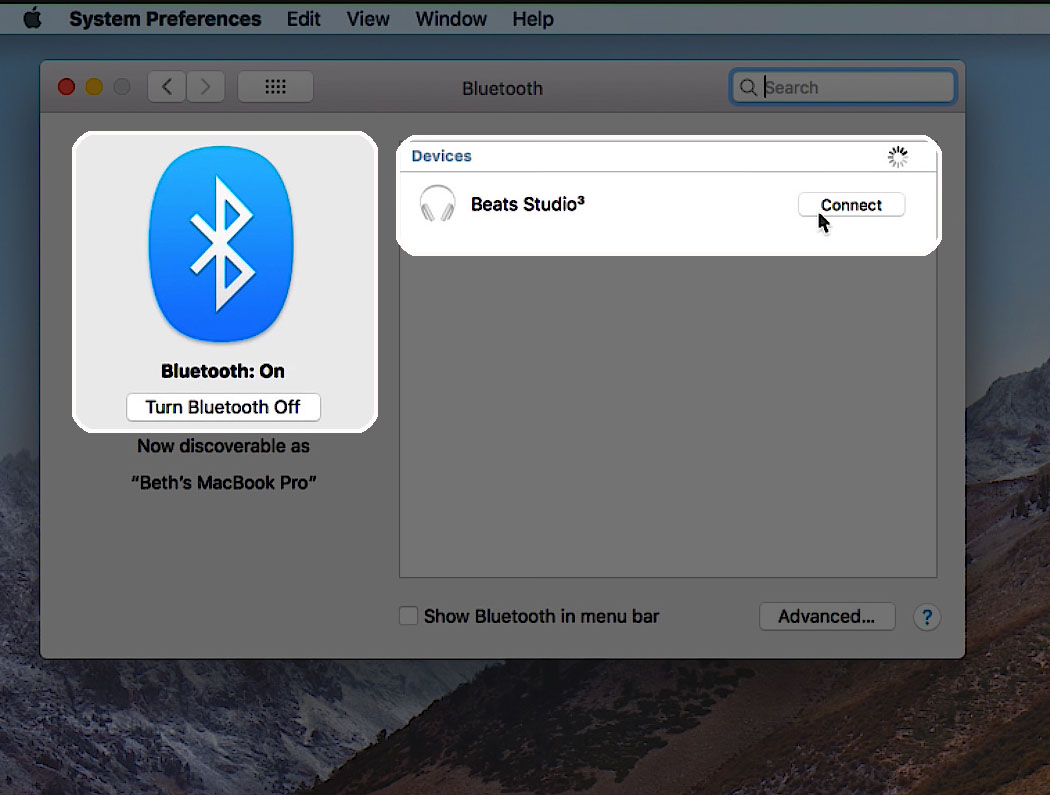
On a Mac Computer
For Mac users, connecting your Beats Studio Pro headphones is also a simple process, often very intuitive if you're used to Apple's system. It involves using the Bluetooth settings found in your Mac’s System Settings. So, let's walk through it together.
- As always, ensure your Beats Studio Pro headphones are charged and in pairing mode. That pulsing light is key for them to be discovered.
- On your Mac, click on the Apple menu in the top-left corner of your screen.
- Select "System Settings" (or "System Preferences" on older macOS versions).
- In the System Settings window, click on "Bluetooth" in the sidebar.
- Make sure Bluetooth is turned "On." There's usually a toggle for this.
- Your Mac will automatically start looking for nearby Bluetooth devices. You should see your "Beats Studio Pro" headphones appear in the list of "Devices."
- Click the "Connect" button next to "Beats Studio Pro." Your Mac will then try to establish the connection.
- Once connected, the status next to your headphones will change to "Connected." The light on your Beats Studio Pro headphones will stop blinking and stay solid.
You can now choose your Beats Studio Pro as your audio output device from the sound settings or directly from the menu bar sound icon. It’s pretty seamless, actually, once you get the hang of it.
Mastering Your Beats Studio Controls
Once your Beats Studio headphones are paired, you'll find they have some really useful built-in controls right on the earcups. These controls, you know, let you manage your audio, calls, and even noise settings without needing to grab your phone or computer every time. It's about making your listening experience more convenient, really.
Adjusting Volume and Playback
For most Beats Studio models, you'll find buttons on one of the earcups, often the left one, that let you control your music. There’s usually a central button, often the ‘b’ logo, and then buttons above and below it for volume. So, here’s what you can do:
- To make the sound louder, press the button above the central ‘b’ logo.
- To make the sound quieter, press the button below the central ‘b’ logo.
- To play or pause your music, press the central ‘b’ logo button once.
- To skip to the next song, press the central ‘b’ logo button twice quickly.
- To go back to the previous song, press the central ‘b’ logo button three times quickly.
These controls, basically, give you full command over your audio without reaching for your device. It’s quite intuitive, actually, once you get used to it.
Handling Phone Calls
Your Beats Studio headphones are also great for managing phone calls when they’re connected to your smartphone. You can answer, end, or even decline calls right from your headphones. It’s a very handy feature when your phone isn't right next to you.
- To answer an incoming call, press the central ‘b’ logo button once.
- To end a call, press the central ‘b’ logo button once during the call.
- To decline an incoming call, press and hold the central ‘b’ logo button for a couple of seconds.
This allows you to stay connected and manage your conversations with ease, which, you know, is pretty essential these days.
Controlling Noise Around You
Many Beats Studio models, especially the Studio Pro, come with noise control features like Active Noise Cancellation (ANC) and Transparency mode. These are really useful for different situations, whether you want to block out the world or hear what’s going on around you. There's often a dedicated button for this, sometimes on the left earcup.
- To switch between ANC (blocking out noise) and Transparency mode (letting sound in), press the dedicated noise control button once.
- Some models might also allow you to turn off both modes, which saves battery life.
This feature, you see, gives you a lot of control over your listening environment, which is quite a benefit for many users.
Using Voice Assistants Like Siri
Your Beats Studio headphones also let you access your device’s voice assistant, like Siri for Apple devices or Google Assistant for Android, which is pretty convenient. This allows you to do things like send texts, check the weather, or set reminders just by speaking to your headphones. It's almost like having a personal helper right there.
- To activate your voice assistant, press and hold the central ‘b’ logo button for a few seconds. You’ll usually hear a chime, indicating that the assistant is listening for your command.
It’s a very useful feature for hands-free operation, and, you know, it just makes things a little bit easier when you're on the go.
What if Things Don't Connect? Troubleshooting Common Pairing Issues
Sometimes, despite following all the steps, your Beats Studio headphones might not connect right away. This can be a bit frustrating, but don't worry, it happens. There are a few common reasons why this might occur, and some simple fixes you can try. It's about systematically checking things, basically.
A Simple Restart Can Help
Just like with many electronic devices, turning things off and on again can often solve a lot of minor glitches. This is a good first step if your headphones aren't showing up or connecting. So, try this:
- Turn off your Beats Studio headphones completely, wait a few seconds, and then turn them back on.
- Do the same for your device (phone, tablet, or computer). Restarting your device can clear up temporary software issues that might be preventing a connection.
This simple trick, you know, often resolves unexpected connection problems, which is quite surprising sometimes.
Forgetting and Re-pairing Your Device
If your headphones were previously connected to a device but are now having trouble, it might help to "forget" the device from your Bluetooth settings and then pair them again from scratch. This essentially resets the connection. So, you might want to try this:
- On your phone, tablet, or computer, go to the Bluetooth settings.
- Find your Beats Studio headphones in the list of previously connected devices.
- There should be an option to "Forget This Device" or "Remove Device." Select that option.
- Once removed, put your Beats Studio headphones back into pairing mode and try to connect them again as if it were the first time.
This step, you see, can fix corrupted connection data, making a fresh start for the pairing process, which is often very effective.
Checking Other Devices
Beats headphones are designed to connect to one device at a time, or sometimes switch between a few if they are linked to the same iCloud account. If your headphones are not connecting to your current device, they might still be connected to another one nearby. So, consider this:
- Check if your Beats Studio headphones are connected to another phone, tablet, or computer in the same room.
- If they are, disconnect them from that device first, then try pairing them with the device you want to use.
This is a pretty common oversight, actually, and easily fixed by just checking your other gadgets.
Battery Levels Matter
We touched on this earlier, but it's worth repeating: low battery can absolutely prevent your headphones from pairing or maintaining a stable connection. It's a bit like trying to run a race on an empty stomach. So, always make sure both your headphones and the device you're trying to connect to have enough charge. This is, you know, a fundamental step.
Distance and Interference
Bluetooth connections work best when the devices are close to each other, typically within 30 feet or so. Also, other electronic devices can sometimes cause interference. So, think about these points:
- Make sure your Beats Studio headphones and the device you’re pairing them with are relatively close to each other during the pairing process.
- Try to move away from other strong wireless signals, like Wi-Fi routers, microwaves, or other Bluetooth devices, which can sometimes cause a bit of a signal mess.
A clear path and close proximity often make a big difference, which is good to keep in mind for a smooth connection.
Keeping Your Connection Strong
Once you’ve successfully paired your Beats Studio headphones, there are a few things you can do to help ensure they stay connected and perform well over time. It’s about maintaining that good relationship between your headphones and your devices, you know. These are just some good habits to pick up.
Regular Use and Recharging
Using your headphones regularly and keeping them charged is one of the simplest ways to maintain their performance. Batteries, you see, tend to do better with consistent use and proper charging cycles. It's almost like keeping a car running smoothly by driving it and filling the tank.
Avoid letting your headphones sit completely drained for very long periods, as this can affect the battery's overall life. A little bit of attention to charging habits can make a real difference in the long run, actually, for how well they connect and hold a charge.
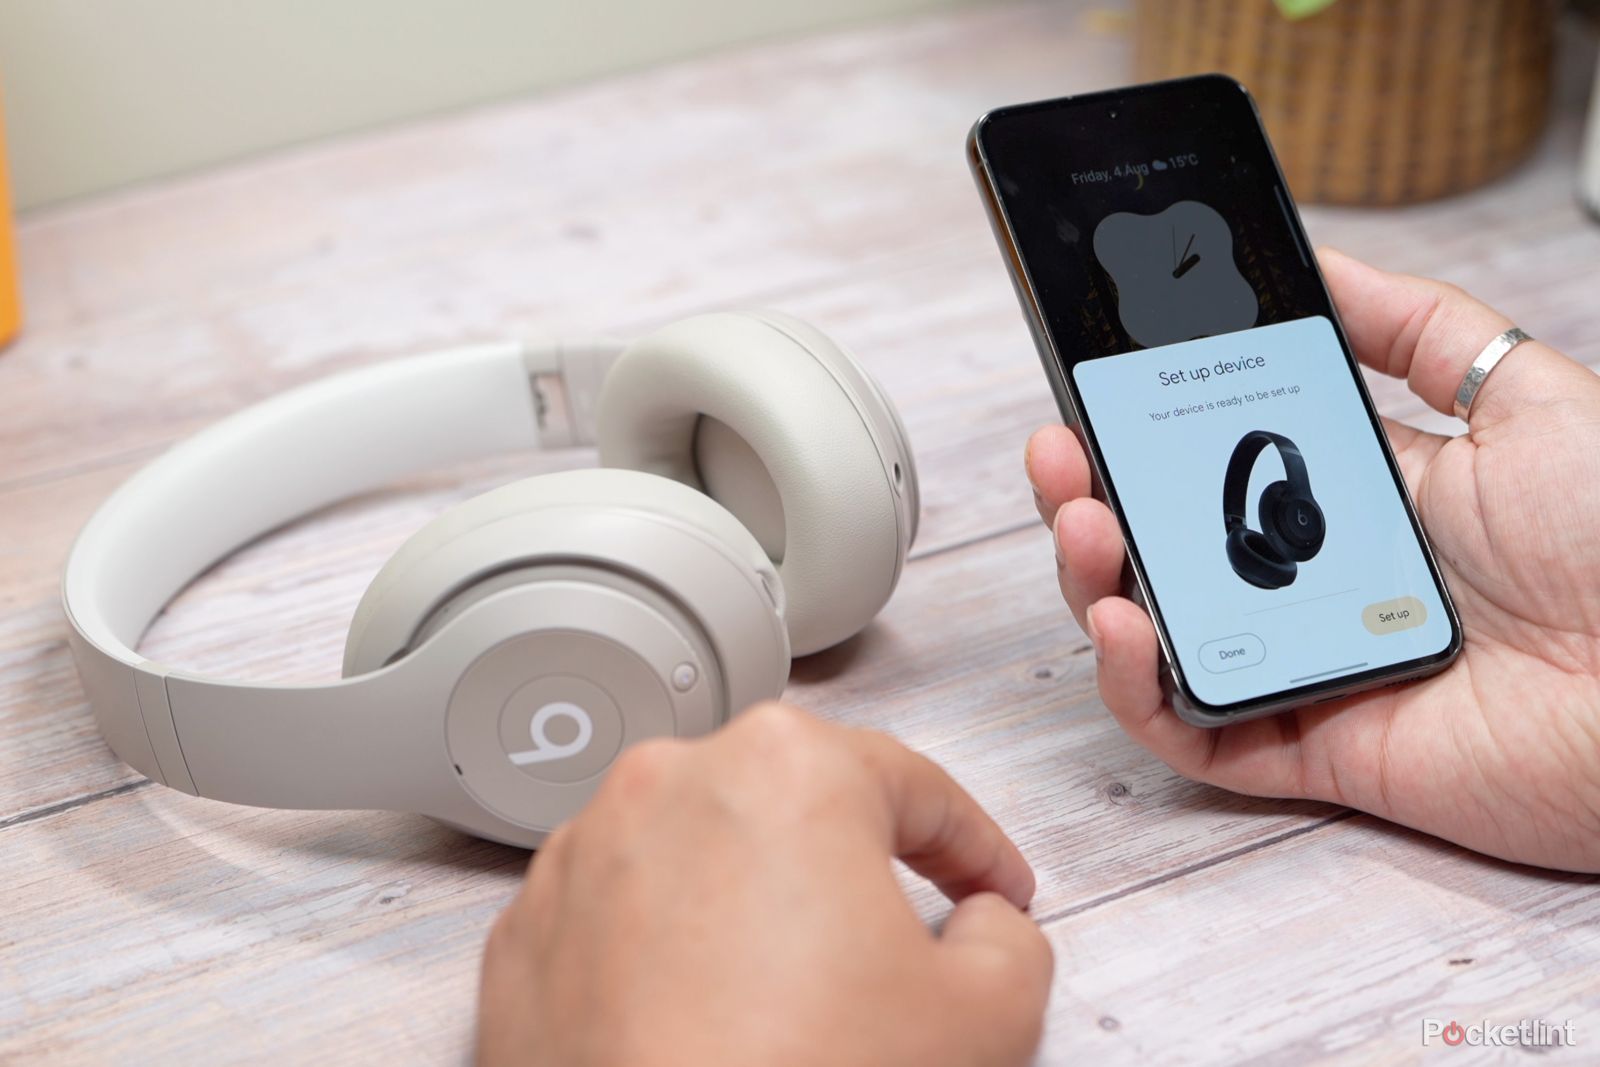
Software Updates for Your Headphones
Just like your phone or computer, your Beats Studio headphones sometimes receive software updates (also known as firmware updates). These updates can improve performance, fix bugs, and even add new features. So, it’s a good idea to check for them occasionally.
You can usually update your Beats headphones through the Beats app on your smartphone,
- Phillip Paley Net Worth
- Ip Address Meme
- Amarican Express
- Rebecca Pritchard Salvage Hunters
- Teach Me First Manhwa
Learn How To Pair Beats Studio 3 Headphones - AudioGrounds

Beats Studio Pro review: An icon reborn
Beats Studio Pro vs Beats Studio 3 Wireless
